Personalised School
Labels
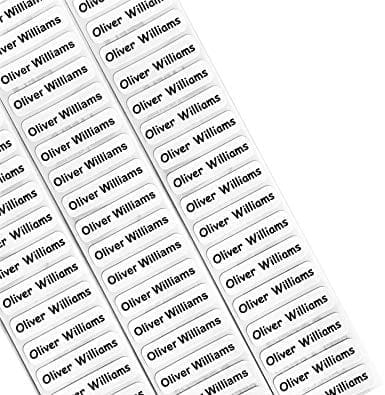
It’s a fact of life that with children – items get left behind and things get lost. Name labels are a simple and effective solution to lost property. Our name labels have seemingly endless uses including the labelling of school uniform, shoes, socks, bottles, lunchboxes, sports equipment, mobile phones, books and stationery, together with toys and sports equipment.
How it Works
Design you sticker
Our user friendly website allows you to choose labels that fit in with your budget. We can choose to purchase a school pack or individual labels.
Place your order
Once you are happy with your selection, you can submit your order. School labels are printed in either ARIAL or COMIC SANS fonts and with the NAME & SURNAME only.
COLLECTION/DELIVERY
Orders take 7-10 working days to complete. Once completed, you can either collect your order or we can courier it to you, depending on the option you choose on check out.
THIS PACK CONTAINS THE FOLLOWING
30 – Iron on clothing labels (46mm x 13mm)
50 – Multi purpose labels
80 – Micro labels
8 – Shoe Labels
1 – Bag tag
THIS PACK CONTAINS THE FOLLOWING
25 – Iron on clothing labels (46mm x 13mm)
25 – Multi purpose labels
40 – Micro labels
20 – Book Labels
48 – Wrap around pen & pencil labels
6 – Shoe Labels
1 – Bag tag
THIS PACK CONTAINS THE FOLLOWING
50 – Iron on clothing labels (46mm x 13mm)
50 – Multi purpose labels
40 – Micro labels
36 – Book Labels
84 – Wrap around pen & pencil labels
8 – Shoe Labels
2 – Bag tag
THIS PACK CONTAINS THE FOLLOWING
30 – Iron on clothing labels (46mm x 13mm)
40 – Multi purpose labels
80 – Micro labels
60 – Wrap around pen & pencil labels
8 – Shoe Labels
1 – Bag tag
Iron on label instructions – black and white labels
Step 1 – Make sure there is no water in iron. Use a hot dry iron on the wool setting no.2
Step 2 – Place label in position on item to be labelled and cover with a hanky or a cloth. *Never place a hot iron directly onto the Iron on label.
Step 3 – Hold down the hot iron over the positioned label for about 10-12 seconds and apply good pressure.
Step 4 – Wait till the hanky or cloth has cooled down completely then remove slowly.
Step 5 – Make sure the label is properly ironed on especially the corners. If not then repeat the above steps with a few more seconds.
Instructions
How-To Apply Name Labels
Before applying name labels, please ensure the surface is clean and dry. Adhere your name labels to a smooth surface. Rub firmly across the label to ensure there are no air bubbles.
Once applied do not wash the item for at least 48 hours to allow the label time to bond.